Greetings to all dental practitioners across India! Today, we’re diving into a topic that is fundamental to your daily practice – how to correctly assemble and use a dental micromotor with a straight handpiece. The micromotor is a versatile tool that enhances our ability to perform precise dental procedures. Its efficient and accurate use can make all the difference in improving patient outcomes.
Understanding the Basics
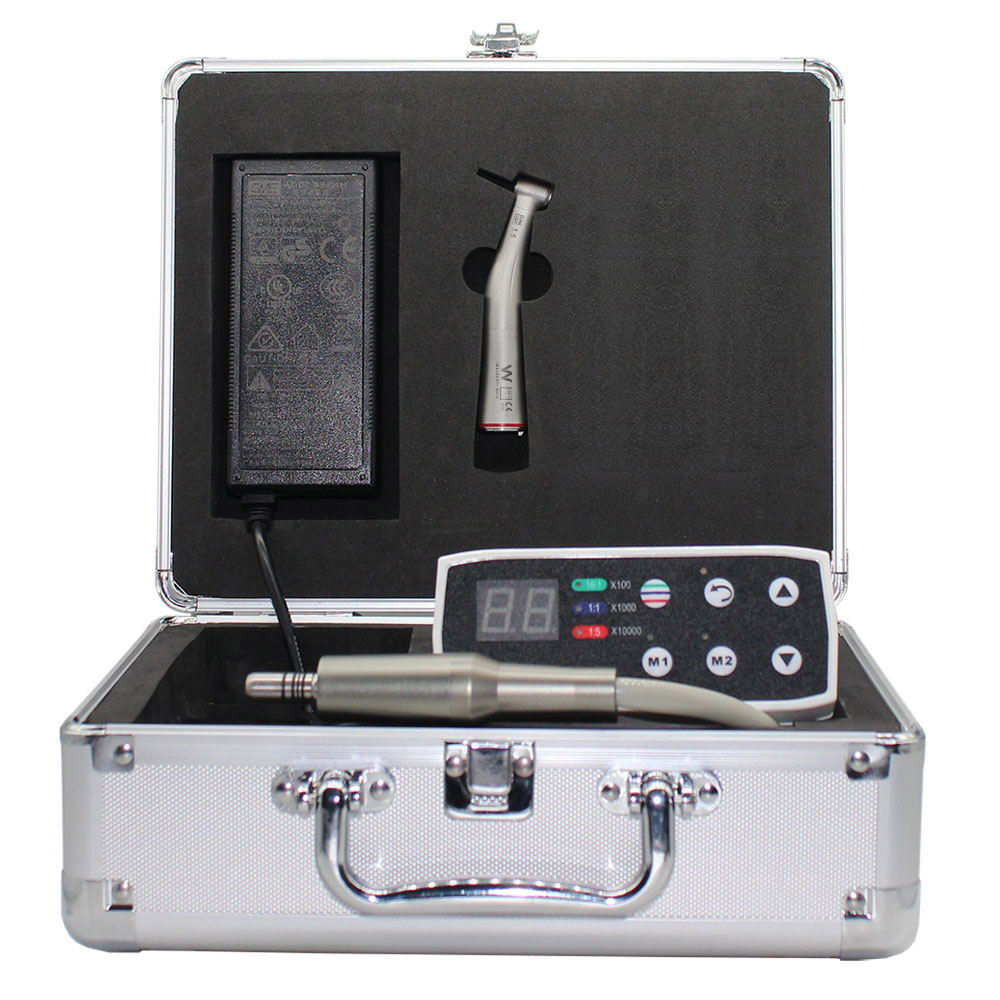
Before we dive into the details of assembly and usage, it’s essential to understand the basics. A dental micromotor is an electrically powered device used to drive dental handpieces at high speeds, allowing for various procedures such as drilling, polishing, and shaping teeth.
On the other hand, a straight handpiece, as the name suggests, has a straight body design, making it ideal for procedures requiring a direct line of sight and maximum control, like prosthodontics work, surgical procedures, and removal of dental caries.
Assembling the Dental Micromotor with Straight Handpiece
Step 1: Check the Components
Begin by ensuring you have all the necessary components. These typically include the micromotor, straight handpiece, connection cord, and the foot pedal. Some micromotor models may come with other accessories.
Step 2: Connect the Handpiece
The handpiece is connected to the micromotor by a coupling system. Ensure that the handpiece and micromotor are aligned correctly. Then, gently push the handpiece into the micromotor’s coupling system until it clicks into place.
Step 3: Connect the Micromotor to the Control Unit
Next, connect the micromotor to the control unit using the provided connection cord. Ensure the cord is securely attached to both ends.
Step 4: Connect the Foot Pedal
The foot pedal allows for hands-free control of the micromotor’s speed. Connect the foot pedal to the control unit using its dedicated cable.
Step 5: Power the Unit
Once everything is connected, plug the power cord of the control unit into a compatible power outlet. Most dental micromotors in India will come with a standard 220-240V plug.
Using the Dental Micromotor with Straight Handpiece
Step 1: Select the Appropriate Bur
Depending on the procedure, select the appropriate dental bur and secure it into the handpiece. Always ensure the bur is correctly positioned and tightly fastened for safety and precision.
Step 2: Power On and Check
Turn on the micromotor and perform a quick check to ensure the device is working properly. The handpiece should run smoothly with no unusual noise or vibration.
Step 3: Control the Speed
Use the foot pedal to control the speed of the micromotor. Press gently for slower speeds and apply more pressure for higher speeds. Practice this to familiarize yourself with the sensitivity of the pedal.
Step 4: Apply the Handpiece
Use the handpiece on the patient’s tooth. The straight design allows for precise control, making it ideal for a variety of dental procedures.
Step 5: Clean and Sterilize
After each use, it’s crucial to clean and sterilize the handpiece to maintain hygiene and prevent cross-contamination. Follow the manufacturer’s instructions for proper cleaning and sterilization methods.
Conclusion
Mastering the use of a dental micromotor with a straight handpiece is a fundamental skill for every dental professional. By understanding the assembly and usage, you can ensure more efficient, safe, and successful dental procedures. Remember, patient comfort and safety should always be your priority